
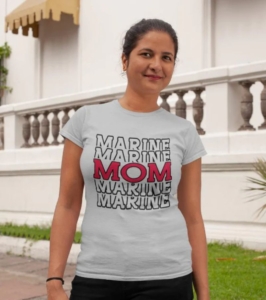
Marine Mom Shirts That Make a Statement
In the world of fashion, some garments not only drape the body but also drape the heart with pride and love. Marine mom shirts are among those exceptional pieces of clothing that go beyond mere fabric and stitching. They are a testament to the strength, love, and unwavering support that mothers of military personnel offer to their brave sons and daughters.
These shirts are not just articles of clothing; they are expressions of pride, symbols of sacrifice, and messages of love. Marine mom shirts have transcended their traditional role and evolved into powerful statements of honor and support.
Patriotic Fashion – Marine mom shirts that Strike a Chord
In the ever-evolving landscape of fashion, clothing transcends its primary function and becomes a canvas for expressions of love and devotion. Marine mom shirts are a striking example of this phenomenon, blending style with sentiment in a way that resonates with a powerful love for the nation and military service.
Marine mom shirts as a Symbol of Love for the Nation
These shirts, more than just mere garments, are a testament to the unwavering patriotism and boundless love that mothers of military personnel hold in their hearts. Each stitch and design choice is carefully selected to showcase American pride and honor the sacrifices made by these courageous individuals. With intricate details like stars and stripes, emblems of different military branches, and heartfelt messages, Marine mom shirts embody the depth of emotions that come with being an marine mom.
The Sentimental Appeal of Marine mom shirts
Wearing an Marine mom shirt goes beyond making a fashion statement; it is a personal and intimate way for these strong women to share their stories of pride in their child’s service. Every shirt represents a profound connection born out of enduring deployments, unyielding support, and the shared experiences of military life. Each thread of the fabric weaves a story of resilience, sacrifice, and the unconditional love that these mothers have for their country and military heroes.
How Marine mom shirts Convey Unwavering Support
Marine mom shirts serve as a visual reminder of the dedication, strength, and unwavering support that these mothers offer to their sons and daughters in uniform. It is a powerful and heartfelt way for them to communicate their patriotism and demonstrate their love for their brave military heroes. These shirts become an enduring symbol of honor and sacrifice, standing as a testament to the extraordinary bond between a mother and her child serving in the military.
Elements that Make Marine mom shirts Stand Out
In a world of trends and fleeting fashion statements, Marine mom shirts hold a special place. They capture the essence of what it means to be a military mom and allow these devoted women to express their emotions in a tangible and lasting way. Beyond the stitching and fabric, each Marine mom shirt carries with it a story of pride, sacrifice, and unwavering love that will endure for generations to come.
Emily is a good t-shirt designer and she prepared beautiful marine mom shirts for your mother. You can find her blog here.
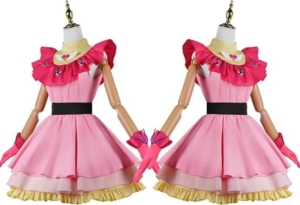
How to choose Oshi No Ko costume
When delving into the art of choosing the perfect Oshi No Ko costume, enthusiasts embark on a captivating journey of self-expression and character immersion. Well, worry not, because in this blog post, we’ll be guiding you through the process of how to choose the ideal Oshi No Ko costume. From considering your favorite character’s style to finding the right fit, we’ve got you covered.
When it comes to choosing Oshi No Ko costumes, there are several factors to consider. This will help you better understand the various costume options available and assist you in determining which character’s attire you’d like to wear. If you’re looking for a diverse range of high-quality, affordable designs, you may want to take the time to visit oshinokomerch.shop.
Character Research and Connection
To truly understand the chosen Oshi No Ko character on a deep level, it’s essential to dive into their backstory, explore their personality, and identify their unique traits. This comprehensive understanding will allow you to accurately capture the essence of the character in your portrayal.
Costume Components Breakdown
The character’s costume should be deconstructed into individual pieces to gain a thorough understanding of its composition. Analyzing each component, including clothing, accessories, and distinctive features, will help define the character’s look.
 https://savvysecondsand1sts.com/wp-content/uploads/2024/02/Is-Oshi-No-Ko-a-Romance.jpg
394
700
Richard
https://savvysecondsand1sts.com/wp-content/uploads/2023/09/savvysecondsand1sts-logo-300x74.png
Richard2024-02-23 01:53:482024-02-23 01:53:50Is Oshi No Ko a Romance
https://savvysecondsand1sts.com/wp-content/uploads/2024/02/Is-Oshi-No-Ko-a-Romance.jpg
394
700
Richard
https://savvysecondsand1sts.com/wp-content/uploads/2023/09/savvysecondsand1sts-logo-300x74.png
Richard2024-02-23 01:53:482024-02-23 01:53:50Is Oshi No Ko a Romance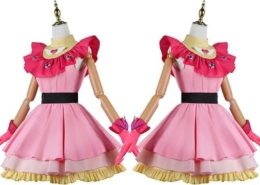 https://savvysecondsand1sts.com/wp-content/uploads/2024/01/How-To-Choose-Oshi-No-Ko-Costume1.jpg
547
800
Richard
https://savvysecondsand1sts.com/wp-content/uploads/2023/09/savvysecondsand1sts-logo-300x74.png
Richard2024-01-07 01:39:522024-01-04 01:43:52How To Choose Oshi No Ko Costume
https://savvysecondsand1sts.com/wp-content/uploads/2024/01/How-To-Choose-Oshi-No-Ko-Costume1.jpg
547
800
Richard
https://savvysecondsand1sts.com/wp-content/uploads/2023/09/savvysecondsand1sts-logo-300x74.png
Richard2024-01-07 01:39:522024-01-04 01:43:52How To Choose Oshi No Ko Costume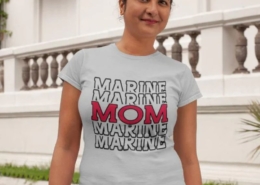 https://savvysecondsand1sts.com/wp-content/uploads/2023/10/Marine-mom-shirts-featured-image.jpg
903
800
Richard
https://savvysecondsand1sts.com/wp-content/uploads/2023/09/savvysecondsand1sts-logo-300x74.png
Richard2023-10-13 13:49:502023-12-27 05:12:58Marine Mom Shirts That Make a Statement
https://savvysecondsand1sts.com/wp-content/uploads/2023/10/Marine-mom-shirts-featured-image.jpg
903
800
Richard
https://savvysecondsand1sts.com/wp-content/uploads/2023/09/savvysecondsand1sts-logo-300x74.png
Richard2023-10-13 13:49:502023-12-27 05:12:58Marine Mom Shirts That Make a Statement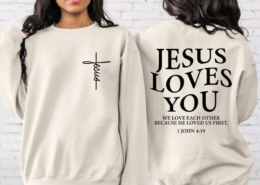 https://savvysecondsand1sts.com/wp-content/uploads/2023/10/Jesus-Loves-You-Sweatshirt4.jpg
602
800
Richard
https://savvysecondsand1sts.com/wp-content/uploads/2023/09/savvysecondsand1sts-logo-300x74.png
Richard2023-10-11 07:00:472023-11-02 01:42:46Jesus Loves You Sweatshirt Reminds of God’s Love
https://savvysecondsand1sts.com/wp-content/uploads/2023/10/Jesus-Loves-You-Sweatshirt4.jpg
602
800
Richard
https://savvysecondsand1sts.com/wp-content/uploads/2023/09/savvysecondsand1sts-logo-300x74.png
Richard2023-10-11 07:00:472023-11-02 01:42:46Jesus Loves You Sweatshirt Reminds of God’s Love